
Snickerdoodle Cookies transformed into easy, gluten-free cupcakes! These snickerdoodle Cupcakes are filled with the same cinnamon sugar goodness in Snickerdoodle Cookies that you can’t get enough of!
Are snickerdoodles your favorite cookies?
If so.. prepare to be BLOWN AWAY! 😉
But for real. Taking the classic cinnamon sugar flavors that are ever-so popular (think snickerdoodles, cinnamon rolls, cinnamon toast crunch) and putting it into a CUPCAKE.
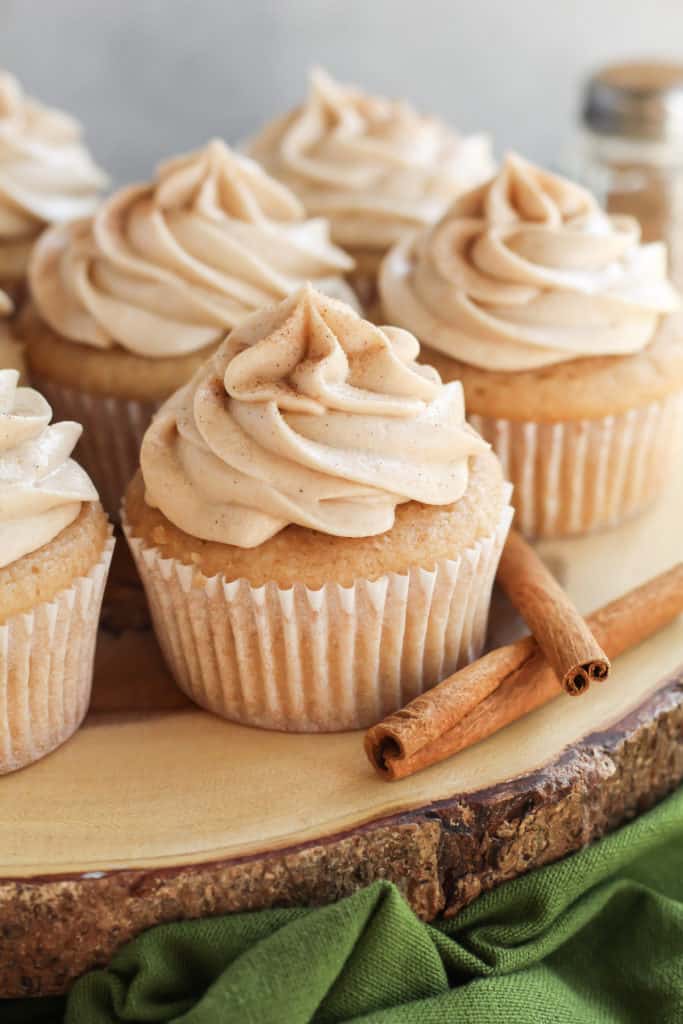
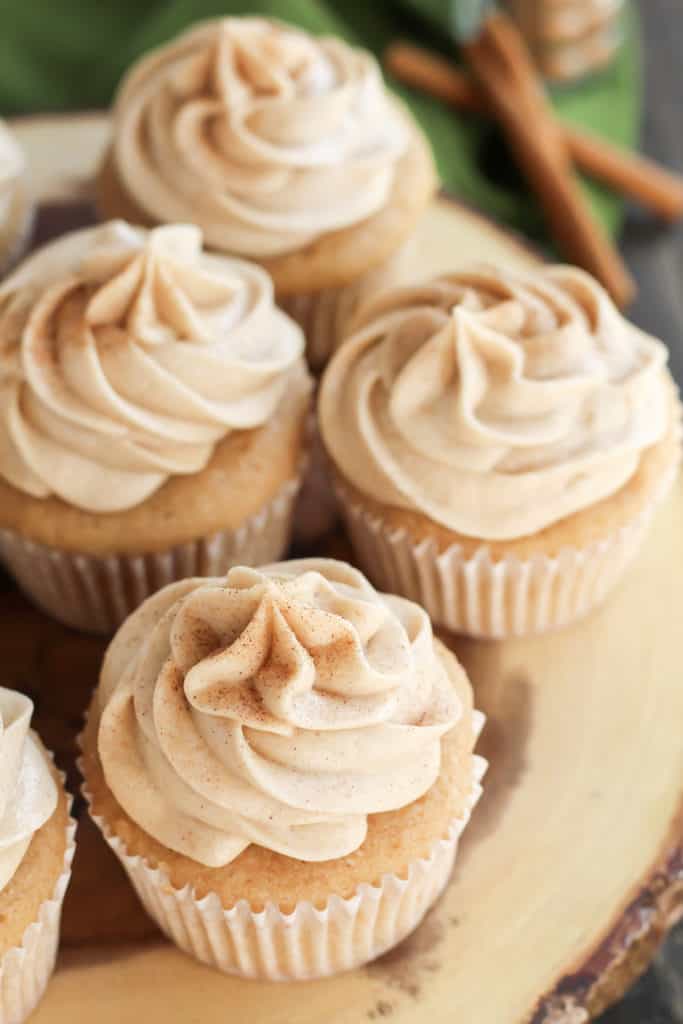
These gluten-free Snickerdoodle Cupcakes start with a thick, moist Cupcake that’s filled with extra cinnamon. Topped with simple cinnamon vanilla buttercream, this easy recipe will be your new favorite go-to, from scratch, dessert.
I think these Snickerdoodle Cupcakes make great birthday party desserts for Fall or Winter birthdays, and an easy Holiday dessert that everyone will love!
After all, who doesn’t like cinnamon sugar?! 😉
So, here’s what you need to know to make these Snickerdoodle Cupcakes a party in your mouth..
First, use a high quality cinnamon. For real. It makes all the difference. Splurge an extra dollar or two and you’ll be amazed at the difference.
Next, be sure to use a high quality gluten-free all purpose flour for these as well.
These could be made with regular all purpose flour, but if you’re making them for a party I’d recommend making them gluten-free! No one will know the difference, and everyone can enjoy the cupcakes this way. 🙂
My two favorite all purpose gluten-free flours are Bob’s Red Mill 1-to-1 and Pamela’s Baking and Pancake Mix. I’ve heard great things about King Arthur as well, but haven’t used it personally.
Next, be sure to mix your (almond) milk and vinegar together and let them sit for about 5 minutes for them to curdle and become “buttermilk.”
Doing this makes the cupcakes extra moist and a little more dense… and delicious. 🙂 I like doing this because it’s an easy way to use “buttermilk” without having to buy an extra thing at the store!
Now, about that Snickerdoodle Frosting…
Be sure to use softened butter to make frosting from scratch. Not too melted (or your poor frosting will drip all over your cupcakes!) and not too hard (or you won’t be able to mix everything together well!).
If your frosting is accidentally too soft, you can try putting it into the fridge for a little bit to harden up, prior to piping it onto your cupcakes.
If you want to make these cupcakes AND frosting entirely dairy-free, I would recommend buying your favorite dairy-free frosting and adding cinnamon to it. I’d add about the same amount of cinnamon to a container of dairy-free frosting as what’s in this recipe, gently stir it in, and then pipe it on your cupcakes.
Then you can have easy, gluten-free AND dairy-free cupcakes!
Which brings me to ONE last thing! Mountain friends (or hill friends?) who live in a high altitude. 🙂
Be sure to reduce the baking powder to 1/2 tsp, and your cupcakes should still rise beautifully. I bake at 5000 ft high, so if you bake a couple thousand feet higher I would recommend reducing the baking powder to 1/4 tsp and giving that a try.
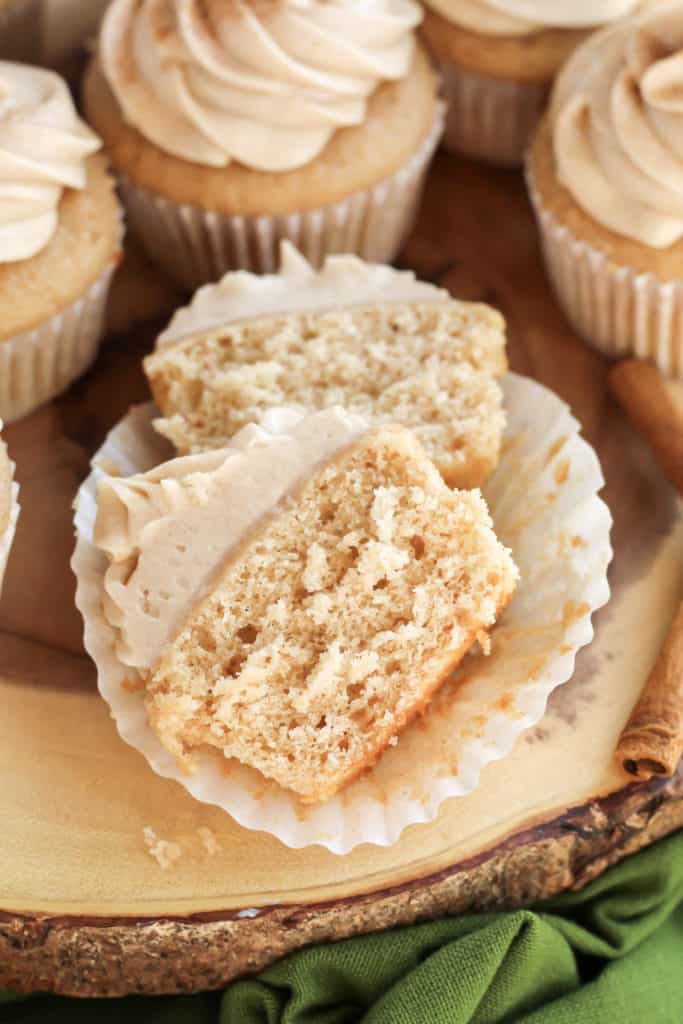
One more inside picture so ya’ll can see the thick yet fluffy interior of these Snickerdoodle Cupcakes!
My son was obsessed and immediately declared that he wanted Snickerdoodle Cupcakes for his birthday (which.. is almost a year away again now, haha!). I hope you all love these as much as he did. 🙂
Looking for more yummy, gluten-free recipes made from scratch? I love my Snickerdoodle Cookies (of course!), Chocolate Red Wine Cupcakes, and Snickerdoodle Pumpkin Muffins. YUM! 🙂
- 1/2 cup almond milk (or milk of choice)
- 1 1/2 tsp vinegar
- 1 1/3 cup all purpose gluten-free flour (I use Bob's Red Mill 1-to-1 all purpose)
- 2 tsp cinnamon
- 1 tsp baking powder
- 1/4 tsp salt
- 1/2 cup coconut oil, melted (or butter)
- 1 cup sugar
- 2 eggs
- 1 tsp vanilla
- 1/2 cup butter, softened
- 2 tbsp water
- 1 1/2 tsp vanilla
- 3/4 tsp cinnamon
- 2 cups powdered sugar
-
In a small bowl, add your milk and vinegar and stir them together. Set aside, and let them set for at least 5 minutes for the milk to "curdle" and become buttermilk.
-
Preheat your oven to 350 and line a muffin tin with cupcake liners.
-
In a small mixing bowl, add your gluten-free flour, cinnamon, baking powder and salt.
-
In a large mixing bowl, add your coconut oil and sugar and whisk them together. Add your eggs, "buttermilk" and vanilla to the bowl and whisk them in too.
-
Pour your dry ingredients into your wet ingredients and stir them together, to form your cupcake batter.
-
Take your cupcake batter and fill each cupcake tin about 2/3 way full with cupcake batter, splitting it evenly among all 12 cupcakes.
-
Bake your cupcakes in the oven for 18-22 minutes, or till the tops are springy to touch and a toothpick inserted comes out clean.
-
Let your cupcakes cool entirely before topping with frosting.
-
In a large mixing bowl, add your butter, water and vanilla and beat them together, using a hand mixer, till smooth. Add your cinnamon and one cup of powdered sugar to the bowl, and use a hand mixer and beat them together till smooth. Add your next cup of powdered sugar and beat them together again till smooth.
-
Pipe or spread your frosting on top of your cooled cupcakes.
-
Devour!
to make this not gluten free can I just swap the gf flour for ap flour?
Yes!
Salted or unsalted butter?
I always use unsalted.
can I use coconut milk instead if almond?
Could these be made a day in advance? Store in refrigerator? Also, I am allergic to coconut and almond, so I would use regular whole milk and vegetable oil. Would that be ok? Thank you!
Hi Joan. Yes, I’d store them in the fridge and then frost them just prior to serving. I would recommend regular whole milk (or skim, 2%) and butter. Hope this helps!
I live in the UK and am wondering if I can use self-raising gf flour instead of regular flour? I’m assuming I would not need to add the baking powder as the self-raising flour already contains it?
Hi Katrina. I agree – I think that omitting the baking powder would work with that flour good then!
So yummy! I ran out of vanilla extract for the icing so I exchanged it for 1 tsp of almond extract instead- it turned out well and complimented the cupcake flavours:)
Sounds delicious! Thanks, Natalie, for the comment.
I just made these for my Dad’s 92nd birthday! OMGosh they are just delicious!!!
Yay! Thanks for the comment, Sue.
If I use butter instead of coconut oil, should I melt the butter or just cream the butter and sugar together?
I’d recommend melted butter (just not too hot!).
Hi. How long do you recommend baking these for mini cupcakes?
Yvonne, great question! I would start checking around the 10 minute mark, and add extra minutes if necessary. A toothpick is probably your best bet to make sure they’re cooked through.
These are the best cupcakes EVER! I’ve made them for countless birthday parties, holiday parties, block parties… the list goes on. And everyone loves them! I’m in Denver and the high altitude adjustments work perfectly. They truly are the best cupcakes ever!
Awesome! Thanks Carrie 🙂
I’ve made these gluten free cupcakes for a friend who is gluten intolerant and EVERYBODY loved them. I wanna make these for another party, but this time not gluten-free. Will the recipe still work if I use normal flour?
Yes! These should work just as well with regular flour. Love hearing that, Raven, thanks!
Can I use olive oil instead if melted butter
This recipe was absolutely delicious! I would highly recommend you try it!!! It melted in my mouth and was a hit !
Awesome! Thank you, Sadia!
The aroma emanating from my kitchen after I had baked these beauties was tantalizing! I baked these for my husbands birthday. He requested no icing, and on their own they did not disappoint. I will definitely be baking these again. Thankyou so much for sharing this recipe.
Great to hear, Caroline! Thanks for the sweet comment.
Hi! Would this recipe convert well to a layer cake?…and if so, would I need to double for two 8 or 9 inch pans? Thanks!
Hi Mary. I haven’t made this recipe into a layer cake myself, but I would think that it should convert well. It will need more baking time. And yes, one recipe would work for one layer of cake, so you would need to double the recipe for two layers. I hope you have success with it and enjoy it!
I made this into a 2 layer cake using 9 inch rounds. I didn’t have coconut oil, so I used soy free earth balance. I made it for my husband’s birthday.
He is not gluten free, I am, but he LOVED it, I do too!!
One of our favorites now! I lightly greased and floured the cake pans with earth balance and the GF flour. In my oven it took approximately 30 minutes to bake, until a toothpick comes out clean and the top of the cakes spring back when touchef.
That’s so great to hear, thanks Sherry!
These were amazing and I had all the ingredients. These will definitely be made again. Thank you!
Awesome! Thanks for the stars Jessica 🙂 So happy to hear that!
Is it safe to use a different oil in place of the coconut oil? Like olive oil?
Hi Katelyn. You know I haven’t made this recipe before with any other oil, so I can’t guarantee it, but I would guess it would work just fine. The flavor will just be a bit different. I’m also loving country crock’s plant butter, if you’re looking for something dairy-free.
What kind of vinegar do you use for the recipe? 🙂
Just white vinegar!
I made these today at 5459′, used 3/4 t. baking powder. Just rereading and see in discussion portion before recipe you say to use 1/2 t. baking powder. My cupcakes rose, then flattened out. However they didn’t sink, so yay!. Also took more like 23 minutes to bake till toothpick was not coated with wet batter. If I had used the lesser amount would they not have flattened out? I’m devastated to say I don’t get to try them because the recipe made 12, and I was asked to deliver 12 for an event 🙁
Hi Diane. First, that’s great news that they didn’t sink! I think at only ~5500 ft your cupcakes would be fine with the larger amount of baking powder. I bake at ~5000 ft in altitude now, without adjusting for altitude with some of my recipes (most of my high altitude adjustments are more so for 6000-8000 ft, depending on the type of baked good it is). My cupcakes are more moist & dense (because that’s how I prefer them) so they should be flat or just barely rounded on top (not as tall as a muffin). Bummer to hear that you didn’t get to try them! Hopefully they were well-received at the event, and I hope this info helps!
What about cassava flour?
Hi Sarah. To my knowledge, cassava flour will not work in these cupcakes in place of all purpose gluten free flour. It might work, but I have never tried it so I can’t guarantee if it will or not, sorry!
Will these freeze well?
Hi Lindsay. I haven’t frozen them myself, but just the cupcakes themselves should freeze fine. I would defrost them in the fridge. Hope this helps!
Hi there,
I’m wondering if you have any egg substitute suggestions that would work best in this recipe? Thank you in advance!
Hi there. I would recommend an egg replacer or a flax/chia egg, although the cupcakes will be a touch more dense with those they should still work well and be delicious.
I just made these, and they are amazing! They are the best gluten free cupcakes I’ve ever made, and I’ve tried a lot of recipes. They’re delicious with or without the frosting! Thanks for sharing.
Awesome! Thanks for the comment, Miriam!
These came out awesome!! Everyone loved them and the frosting was DELICIOUS! <3
Great to hear, Elana!! Thanks for the comment.
can you use almond flour?
Hi there. No, almond flour would not work as a replacement. Sorry!
These are amazing!! Any trick to making the frosting more whipped looking? Ours kind of looks clumpy and gross- tastes great but looks… not like yours haha! We are trying to use vegan butter…
Hi Mindy. Happy to hear it! Sorry to say though, I’m not sure what went wrong with your frosting. What kind of vegan butter did you use? Maybe it’s the brand? I know some vegan butters are better for baking and others are better for spreading.
If I already have butter milk on hand cause I can use that instead of making it??
Hi Nicole, yes that should work just fine!