
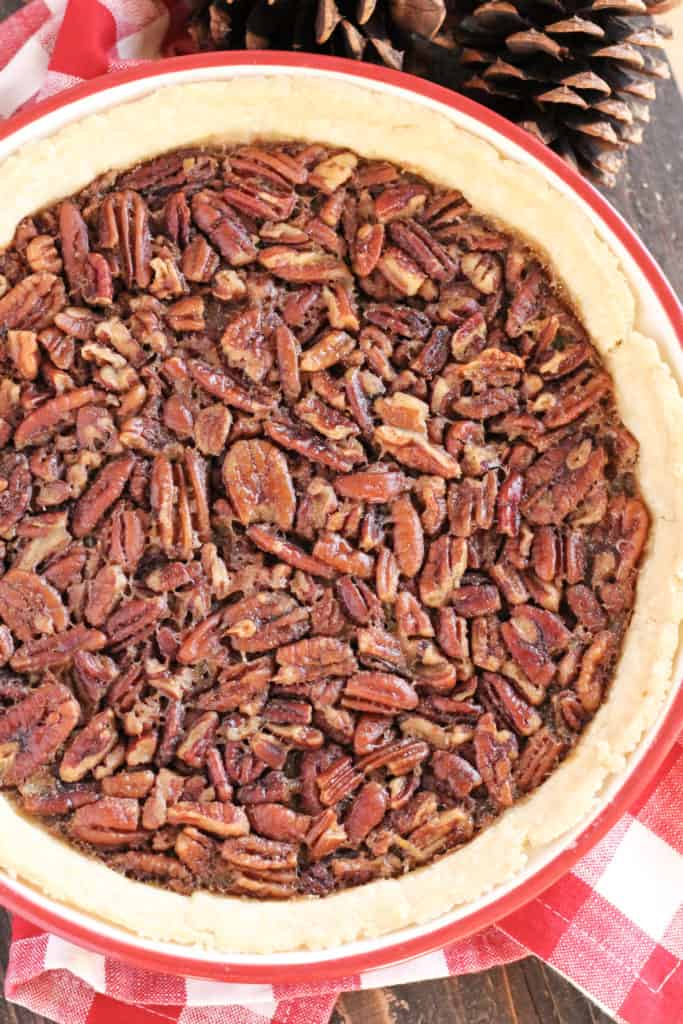
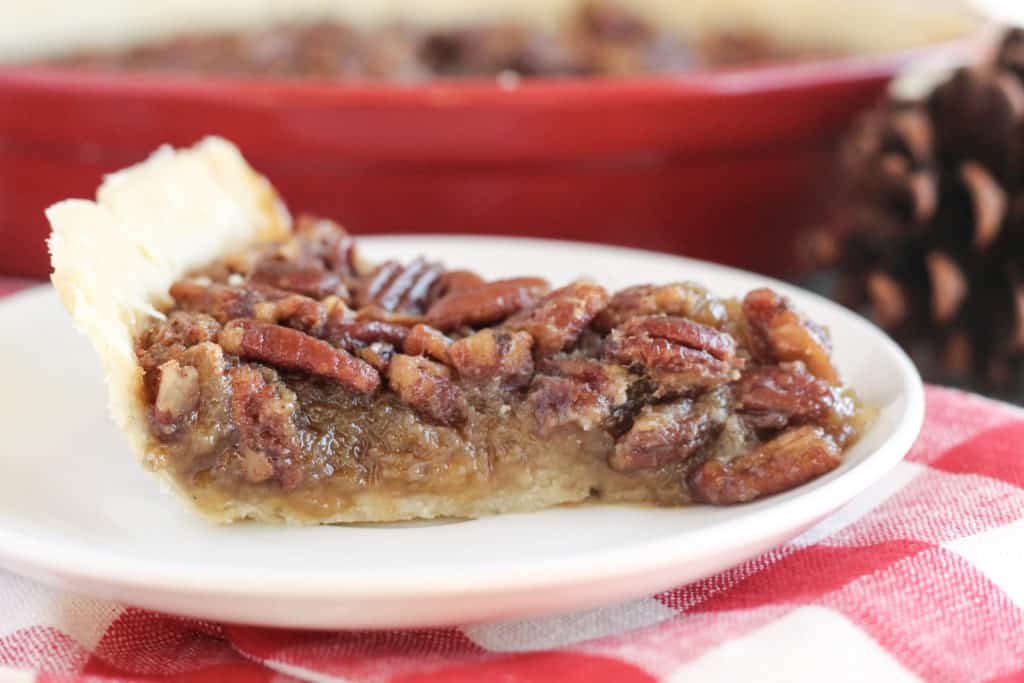
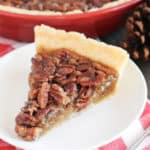
With a buttery, crispy crust, and a soft yet crunchy pecan, brown sugar, and maple syrup filling, this gluten-free Pecan Pie is a Thanksgiving or Christmas dessert MUST HAVE!
Does the idea of making homemade Pie make you nervous?
If you said yes, I’m in the same club as you.
For some reason, the simple beauty of a classic, homemade pie is daunting. Cookies? Easy, no big deal. But pie?? What if the crust falls apart? What if the filling doesn’t set?! WHAT AM I DOING?!
Especially if you’re making a gluten-free pie crust! That makes me nervous, times ten.
All that being said, I’m not even a big pie girl myself. I’d much rather have a cookie. Or at least, that’s what I thought, until I had this Pecan Pie. I haven’t had pie in years because of the crust, and because I didn’t trust gluten-free flour enough to nail down a great pie crust recipe.
This year, I told myself, would be different. I’ve heard from a few of you that you needed a solid, reliable gluten-free pie crust. So, I made it my mission. And… I’m beyond psyched to share this recipe.
Like… I ate half of this pie myself. And, I have zero regrets. 😉
First, let’s start talking pie crust.
The scariest part first!
This crust recipe is made with the use of a food processor. Did you know you can make an entire pie crust in your food processor?! You could cut the butter in with a tool by hand still, but a food processor makes the whole thing so incredibly quick and easy. It’s amazing!
To begin, you’ll add your gluten-free flour, salt, and cut up chunks of butter to your food processor with the s-blade on. Pulse your flour mixture till your butter is evenly dispersed throughout the flour, till the flour mixture sort of looks like thick sand.
Next, add one tablespoon of water, pulse again, and continue till all of your water has been added in. You should have a nice, crumbly looking pie crust pile in your food processor now.
So, here’s the fun part. Take a large piece of parchment paper (bigger than your pie pan) and dump your pie crust crumbles out onto it. Gently push your crumbles together to form one round pie dough ball. Take another piece (the same size) of parchment paper and place it on top of the pie dough.
Using a rolling pin, roll your dough out, evenly around till it’s at least two inches larger than your pie pan all the way around. That way you have crust up the sides of your pie! I like to double check by placing my pie pan on top. If there isn’t enough crust sticking out around the pan, keep rolling!
Most important step is next: Get your pie pan and spray it with non-stick spray.
Now, remove the top piece of parchment paper from your pie crust, slowly and gently. Put your hand under the bottom piece of parchment paper, in the middle, and gently yet quickly, flip the crust into your pie pan in the middle. Gently and slowly remove the top sheet of parchment paper and press the pie crust evenly in around your pan.
Crust Questions…
Too much crust sticking out? Trim or tear the edges off.
Not enough crust in one part? Try and use the edges you trimmed off, place them in the spot that’s missing, and then gently press the dough together. Patch work! 🙂
Crust not high up enough all the way around the edges? I would gently push the crust around, up and towards the top.
Crust didn’t quite make it into the middle? Flip the crust back out, gently push it back together if it’s cracked in a few places, and then try flipping it into the pan again.
I’ll let you in on a secret. The last time I made this pie… I forgot the non-stick spray. WHAT?! #mombrain. Thankfully I remembered, but it wasn’t until after I had already put the crust in the pan. I flipped it back out, fixed a few cracks in the crust, then flipped it back in AFTER spraying my pan down. Good as new. Lesson learned.
You can finish off the top of your pie crust however you like. Pretty crimping, simple straight edge.. whatever your heart desires.
Now, you’ll want to wrap your crust in plastic wrap and place it in your fridge for at least 4 hours (and up to 24 hours). This ensures your crust will bake properly and helps the butter flavor to get “soaked up” into the crust more.
Ready for the pecan filling now?!
I know I am! The pecan filling is incredibly easy, so nutty, buttery, sweet and delicious.
First, in a small bowl you’ll want to whip your eggs separately. Whip them for a few minutes till they’re frothy, light and fluffy!
Then, in a large mixing bowl you’ll add your brown sugar, maple syrup, butter, vanilla, cinnamon, and salt and stir them together. Add your eggs to the bowl and gently stir them in.
Scatter your pecans evenly across the bottom of your pan, and pour your wet mixture across the top. That’s it.
Bake in the oven at 350 for 40-50 minutes, or till the top of the pie is set (and has puffed up a bit – it will settle back down) and there’s only a slight jiggle in the center. As the pie cools it will set entirely.
Check your pie about half way through the baking time to see if your crust is getting too dark. If it is, tent foil over the pie to keep it safe!
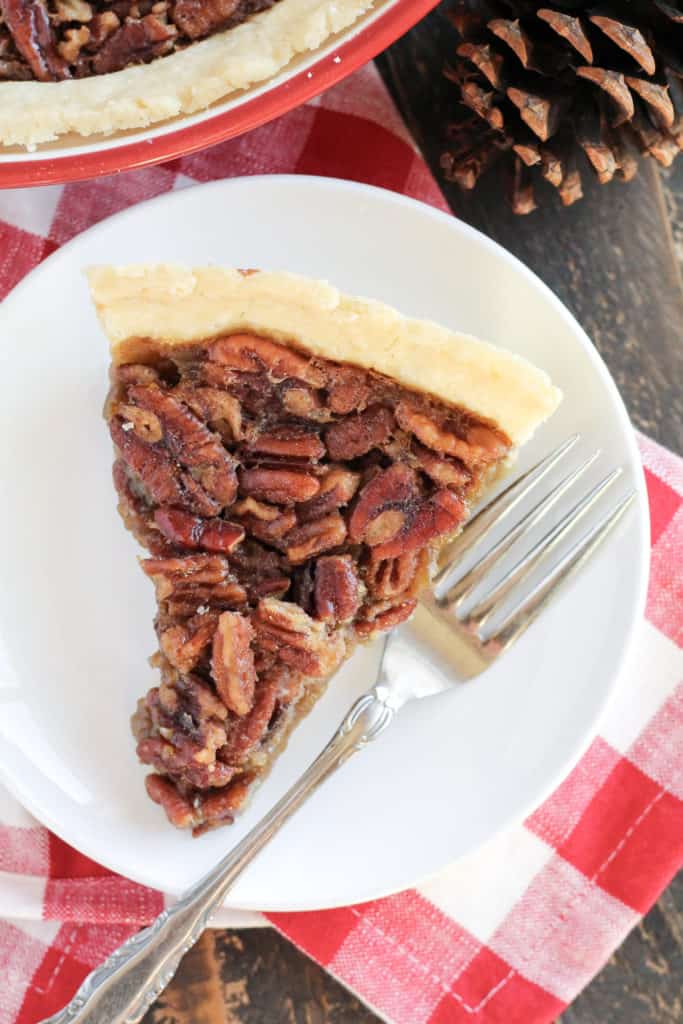
Be sure your pie cools entirely before cutting into it or you’ll literally have a hot mess! It’ll take several hours for your pie to cool.
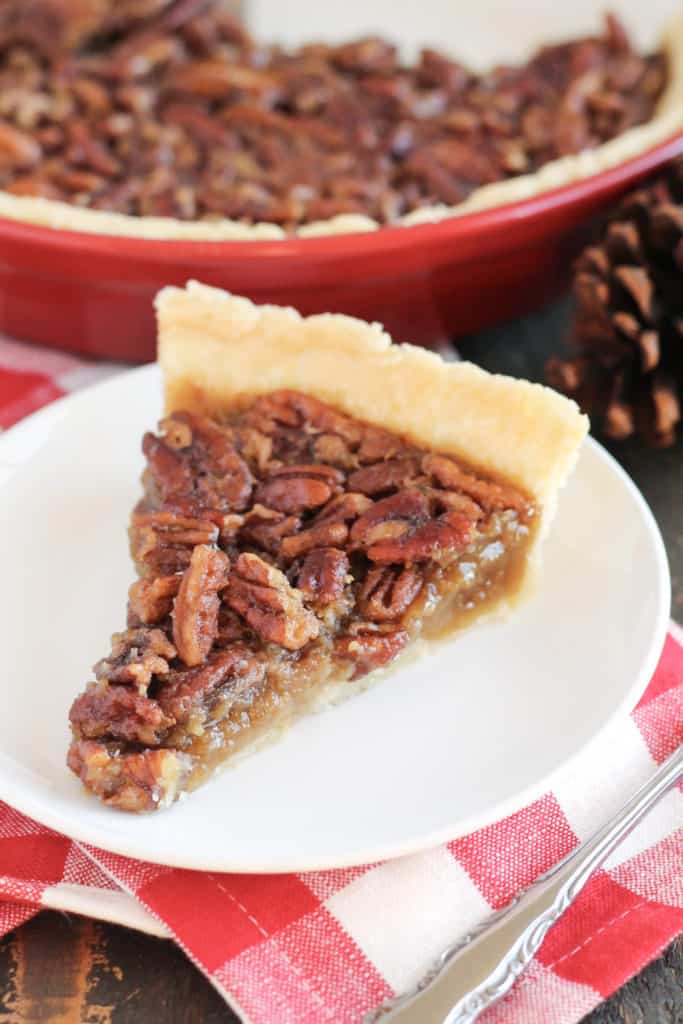
This gluten-free Pecan Pie isn’t healthy, but it’s made just a tad healthier with no corn syrup and a little less butter than most. Still entirely decadent and the best classic Thanksgiving or Christmas dessert around.
P.S. You can use this crust recipe with other pie fillings inside, like pumpkin pie, that also only has a crust on the bottom and bakes for a similar amount of time.
Take some deep breaths, trust yourself, and give this gluten-free Pecan Pie a shot! It’s really not as hard as it looks. 🙂
Need more Holiday dessert ideas, just in case? I’d recommend my gluten-free Snickerdoodle Cupcakes, (grain-free and vegan) Thumbprint Cookies, or Skinny Mini Pumpkin Cheesecakes.
- 1 1/4 cup gluten-free all purpose flour (I use Bob's Red Mill 1-to-1)
- 1/2 tsp salt
- 1/2 cup butter, cut into small chunks (or dairy-free butter alternative, or refrigerated coconut oil)
- 1/4 cup ice cold water
- 3 eggs
- 1 cup brown sugar
- 1/2 cup maple syrup
- 1/4 cup butter, melted (room temperature) (or dairy-free butter alternative or coconut oil)
- 1 tsp vanilla
- 1/4 tsp cinnamon
- 1/4 tsp salt
- 1 1/2 cup pecans, pieces or halves
-
To your food processor (with your s-balde in), add your gluten-free flour, salt, and chunks of butter. Pulse together till the butter has been finely ground into the flour (it will look kinda like thick sand). Add one tablespoon of water to the food processor, pulse, and continue till all the water has been added.
-
Now to roll your pie crust out, you'll need two pieces of parchment paper to put your crust between (both pieces larger than a pie pan). Put one piece down, and dump your pie dough crumbles onto it. Gently push the crumbles together to form one ball of dough. Add your other piece of parchment paper on top.
-
Using a rolling pin, roll the dough out till you have one, uniform, thin, round pie crust. You should be able to place your pie dish on top of the dough and still see extra dough sticking out about two inches past it, all around.
-
Spray your pie dish with non-stick spray.
-
Gently remove the top sheet of parchment paper from your pie crust. Quickly and gently, with your hand under the other piece of parchment paper, flip your pie crust over into the middle of your pie pan. It should fall in place around the pie pan. Gently remove the second piece of parchment paper.
-
Gently press the dough around the pie pan, so that you have one smooth even layer on the bottom and edges evenly around the entire pan. If you have excess dough coming over the edge of the pie pan, you can cut or tear that off.
-
Lastly, finish the crust of your pie by smoothing out or crimping the top edge of the crust, however you like.
-
Lightly wrap your pie crust with plastic wrap, and place in the fridge for at least 4 hours for the butter to harden and more flavor to form.
-
To begin, preheat your oven to 350. You will also need a prepared pie crust in a pie pan.
-
Add your eggs to a small bowl and whisk them for a few minutes, till they're light and frothy.
-
In a large mixing bowl, add your brown sugar, maple syrup, butter, vanilla, cinnamon and salt. Whisk together. Add your eggs and gently whisk them into your batter.
-
Sprinkle your pecans across the bottom of your pie crust. Pour your batter over your pecans.
-
Bake in the oven for 40-50 minutes, or till the pie is set (The top will appear more solid, but the middle may jiggle a little still if you move it). Check your pie about half way through the baking time to see if your crust is getting too dark. If it is, tent foil over the pie to keep it safe!
-
Let cool for SEVERAL hours. Then slice, share, and devour!
*The pie can be stored for 24 hours on the counter, covered, at room temperature. After that it needs to be in the fridge, covered, and it will last 4-5 days.
*To make this pie dairy-free, be sure to use either a dairy-free butter alternative (like Earth balance) or coconut oil. For the crust, the coconut oil will need to be refrigerated first to be cold and solid.
The recipe for this pie crust was based off of this recipe.
could you trade out the maple syrup for sugar free syrup or would the consistency be too thin? any advice appreciated! trying to make this healthier for cholesterol issues but still love a good pecan pie!
Hi Autumn. Sorry for the late response. I’ve never worked with sugar free syrup so I’m not sure how that would work either.
This sounds delicious! Do you think that this could be made into mini pies using a muffin tin? How long would the baking time be?
Hi Darcie. I would recommend looking for another recipe that’s specifically tailored to mini pies. I don’t know how long the baking time would be.
Hi! How long can you leave the pie crust refrigerated before baking? Thank you!
Hi Caroline. The pie dough should be good in the fridge for up to 3 days (I usually use it within 1-2 days, so it can be made ahead of time but doesn’t sit for too long).
I would love to make this but I have an egg allergy. What could I use as a substitute?
Hi Zoe. That’s a tough one! I have seen Pecan Pie made with flax eggs and turn out well online, but I’ve never made it myself without eggs. If I were you I would try it with flax eggs (or maybe an egg replacer), or maybe google “vegan pecan pie” for some other ideas. I’ve seen pecan pie made with coconut milk or tofu too, to help give the right texture that eggs would supply. Sorry I can’t be of more help!
Wow, one of the best pies I’ve ever tasted! I was hesitant to make the crust from scratch, but it had great instructions and tasted so good. Love the filling ingredients too – highly recommend!
Love it!! Thanks, Lisa, for leaving a comment!
Thanks for this! Love it without the corn syrup. I’m not a pastry baker so I started with a pre-made gf crust. Yum! Happy Thanksgiving.
Awesome! Your welcome. Happy Holidays!
So you don’t need to pre-bake the crust at all? It doesn’t get wet on bottom?
Just made crust and put in fridge to do rest tomorrow for my gf/df daughter. Thanks!!!
Nope! Fill it and bake it all in one. I hope you like it!
Thank you for the recipe. Can you freeze it? Patricia.
Hi Patricia. That’s a great question. I’ve never frozen Pecan Pie before, but I would think that it should freeze just fine. I would follow some of the tips in this article though: https://www.foodnetwork.com/thanksgiving/thanksgiving-desserts/can-you-freeze-pecan-pie Hope this helps!
Thank you! This is so delicious. My husbands favorite pie and mine too. So much better minus the corn syrup. The crust is amazing too.
So happy to hear that Deirdre, thank you for taking the time to leave the comment!
Thanks for sharing! Does it keep long?
Hi Vanessa – The pie will keep (covered, in the fridge) for about 4-5 days.
This looks so good! It is nice to avoid those fake sweetener for a cleaner Thanksgiving!
Yes, thanks Suzanne!
I would love to try this crust for my celiac daughter, but I have a dairy allergy. Would coconut oil or shortening or something else be the best alternative to the butter in this recipe? My wheat based crust I make with butter flavor shortening. I am at 6900 feet elevation.
Hi Lynette. I have made this crust with coconut oil but it’s a little trickier and doesn’t have the same classic pie crust flavor (aka butter!). For this Thanksgiving I was actually going to make this and try using a dairy-free butter alternative (like earth balance sticks), since my sister is dairy-free too! Something like that should work well. You can use coconut oil, but if you do just be sure that it’s entirely solid prior to using it (off to the fridge if it’s not!). I haven’t made this crust with shortening so I’m sorry to say that I don’t know if that would work. You could try using butter flavored coconut oil too – I use that a lot when I cook and I bet it would be delicious in a pie crust! Hope this helps!