
Gluten-free Brookies are a fun bar with a layer of fudgy brownie on the bottom and a layer of chocolate chip cookie on top. If you want the best of both worlds, you’ll love these Brookies!
What’s better, brownies or chocolate chip cookies?
I don’t know that I could pick. I love love love brownies. But, chocolate chip cookies are a classic that I can’t live without either!
Rather than picking one or the other, make Brookies instead. 🙂
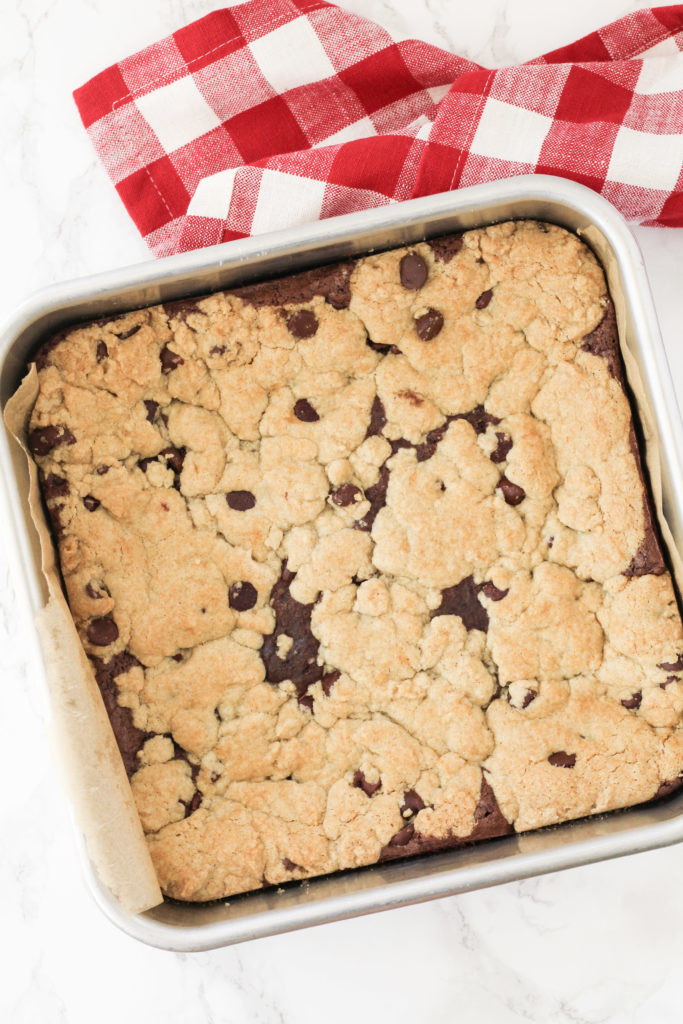
Brookies are brownies and chocolate chip cookies combined. My gluten-free Brookie recipe has a thin bottom layer of fudgy brownie with a thick layer of chocolate chip cookie on top.
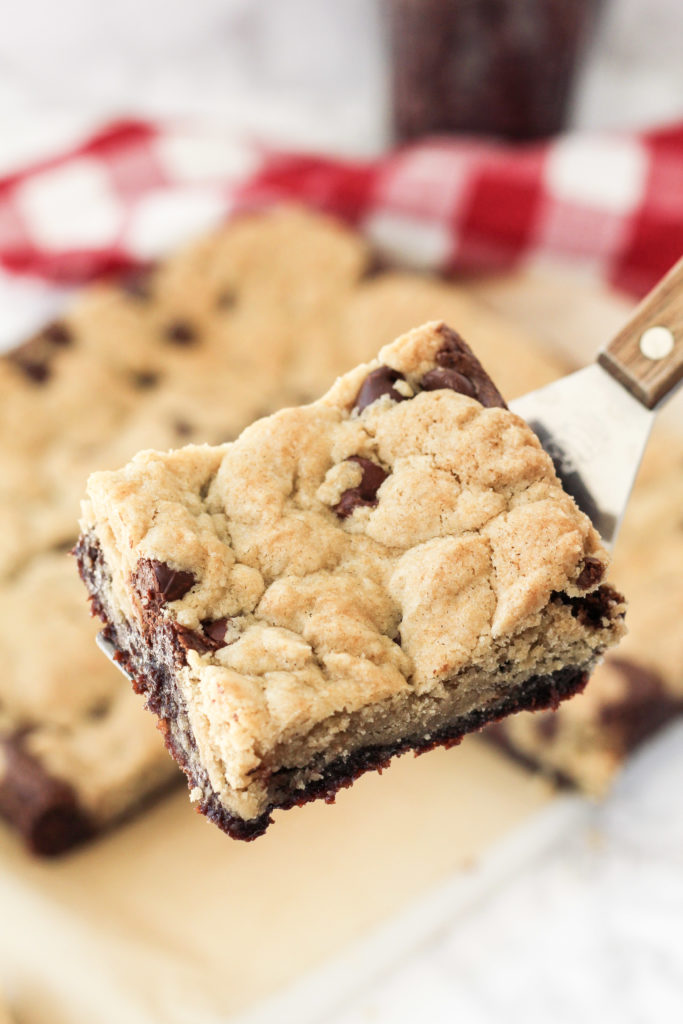
Fudgy, rich brownies combined with buttery, sweet chocolate chip cookie flavor.
You cannot beat this combination.
Years ago my Mom made some for my birthday. The idea was great, but the recipe she tried left a little to be desired. They were pretty dry and had too much chocolate (believe it or not!).
So I’ve made my own version of gluten-free Brookies that are so so so good. They have a thin layer of my classic Brownie recipe on the bottom and a thick layer of my classic chocolate chip cookie recipe on top.
These Brookies are the perfect balance of flavor for just enough rich brownie flavor, but not too much to overpower the cookie flavor. Plus, I have an easy trick to make sure your Brookies cook correctly so you don’t end up with an overcooked top layer and undercooked bottom layer.
If you’ve never tried Brookies before, WHAT are you waiting for?!
First, I’d like to talk about the most important thing for these Brookies.
These Brookies are so thick that you need to bake them for most of the time COVERED with tin foil. If you don’t you’ll end up with a brownie layer that’s too raw and a cookie layer that’s overcooked and crumbly.
Cooking them covered ensures that your cookie layer isn’t overcooked (and doesn’t dry out) and leaves your brownie layer fudgy but not raw.
Other than that, these Brookies are a really simple recipe.
First, you’ll make the layer of brownies and spread it onto the bottom of your pan. My brownie recipe is super easy, containing only pantry staples:
- butter
- white sugar
- eggs
- vanilla
- gluten-free all purpose flour
- cocoa powder
- salt
Plus, it’s all made in one bowl! My favorite way to bake. One thing I did differently with my brownie layer (than in my regular brownie recipe) was to omit the chocolate chips. When I made these with chocolate chips (in the brownie layer) I felt they were too chocolate-focused, and I didn’t get enough of the cookie layer flavor.
Next, you’ll make my gluten-free Chocolate Chip Cookie layer. It’s also made with super simple ingredients, like:
- butter
- white sugar
- brown sugar
- egg
- vanilla
- gluten-free all purpose flour
- baking soda
- salt
- chocolate chips
And, again, it’s made in one bowl (yay!). One thing I did differently here is add a little extra vanilla. This helps enhance the cookie flavor, which needs an extra boost to stand out against the brownies.
You can add your chocolate chip cookie layer on top of your brownie layer however you like really, as long as it’s a consistent layer. You can crumble the dough across the top. Or, you can scoop your dough with a cookie scoop, flatten it between your hands, and lay it across the top. This will give your bars a cleaner appearance.
Then, you’ll bake them, and exercise as much patience as you have while your house fills with the most delicious smells ever created (brownies and cookies)! 🙂
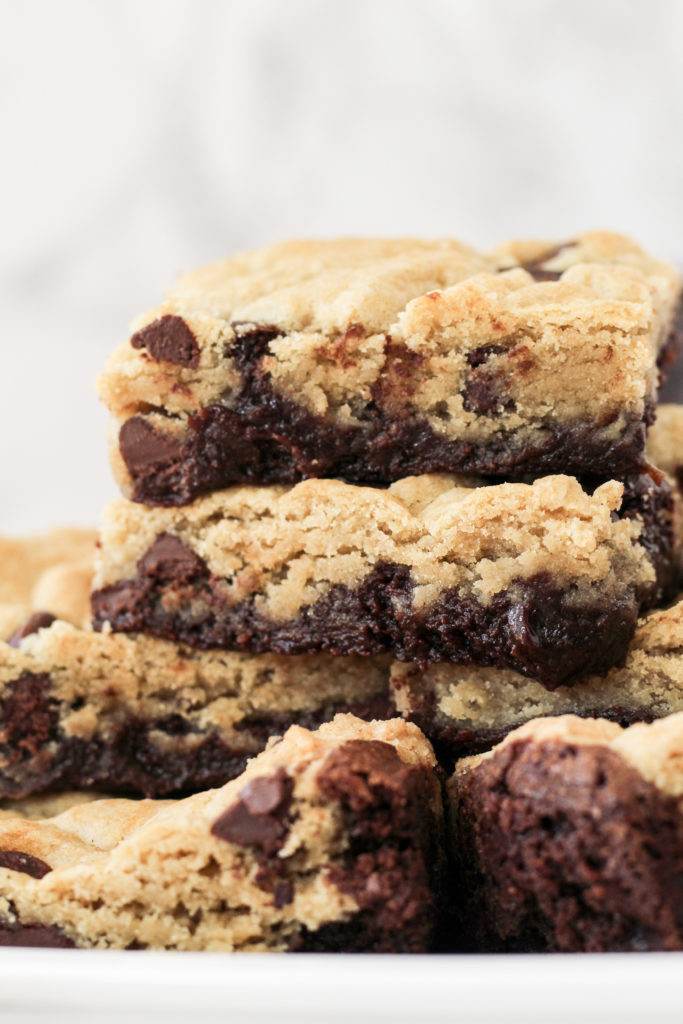
After cooling, DIG IN. These gluten-free Brookies are rich, fudgy brownies AND buttery, sweet chocolate chip cookies combined (aka the best dessert ever invented). And don’t forget to take a lick of both the brownie and cookie batter together too! 😉
After you make these, let me know what you think! Leave a comment and star rating, below. I seriously love to hear from ya’ll.
Before you go, you miiight also want to check out my gluten-free Sugar Cookie Bars, Lemon Cheesecake Bars, and No Bake Chocolate Peanut Butter Oatmeal Bars.
- 1/2 cup butter, softened
- 1 cup white sugar
- 2 eggs
- 2 tsp vanilla
- 1/2 cup gluten-free all purpose flour
- 1/3 cup cocoa powder
- 1/2 tsp salt
- 1/2 cup butter, softened
- 1/2 cup white sugar
- 1/4 cup brown sugar
- 1 egg
- 2 tsp vanilla
- 1 1/2 cups gluten-free all purpose flour
- 1/2 tsp baking soda
- 1/2 tsp salt
- 1/2 cup chocolate chips
-
To begin, preheat your oven to 350. Line a 9×9 pan with parchment paper (with two ends sticking out) for easy removal.
-
To a medium mixing bowl, add your butter and sugar and beat together with a mixer till creamy. Add your eggs and vanilla and briefly blend them in.
-
To the same bowl, add your flour, cocoa powder and salt. Mix together till you have a smooth brownie batter.
-
Spread into the bottom of your pan in a thin, even layer.
-
To a large mixing bowl, add your butter, white sugar and brown sugar and beat together with a mixer till creamy. Add your egg and vanilla and briefly blend them in.
-
To the same bowl, add your flour, baking soda and salt. Mix together till you have a thick cookie dough. Add your chocolate chips and fold them in.
-
Crumble all of the cookie dough across the top of the brownie batter layer (or scoop the dough in a cookie scoop, flatten it out in your hands and place it on top of your brownie batter. Repeat till you have used all of the cookie dough).
-
Cover with aluminum foil. Bake in the oven for 35 minutes. Remove the foil, and bake another 10-15 minutes (when you gently shake the pan back and forth the center should only lightly jiggle).
-
Let cool entirely before cutting.
-
Cut into 16 bars. Devour!
Stored in an airtight container, these taste best within 3-4 days (they will start to dry out after that).
Hello,
What all purpose gluten free flour did you use for this recipe? I feel like they are not all created equal, and with everything I make they turn out different. Would love to know what created those beautiful pictures! Thank you!
Hi Lauren. I have used both bob’s red mill 1-to-1 and king arthur measure for measure. I love both! I hope this helps.
I made these for one of my best friends who has celiac disease. They were amazing. And they do not taste any different than regular brookies
I have made these so many times because they are such a hit! Everyone who has tasted them, get addicted and the jaw dropping shock that occurs when I tell them they’re gluten free is priceless. Tbh though, I’m not entirely sure they actually know what gluten free is. I do add dark chocolate chips to the brownie layer and use mini m&m’s in the cookie layer. Thank you so much for this recipe…it is too good ❤️